> ## Documentation Index
> Fetch the complete documentation index at: https://docs.t3planet.de/en/latest/llms.txt
> Use this file to discover all available pages before exploring further.
# Installation
> Install T3 Avatar in TYPO3
# Installation
## Important Notes Before Installation
You should install the TYPO3 template at the new blank TYPO3 Instance! If you are trying to install the template in your existing used TYPO3 Instance, your current data may lose.
## License Activation & TYPO3 Installation
To activate license and install this premium TYPO3 product, Please refer this documentation [License documentation](/en/latest/en/latest/License/Index)
## Important Notes After Installation
After Activating ns\_theme\_t3avatar,do not forgot to follow below steps as well
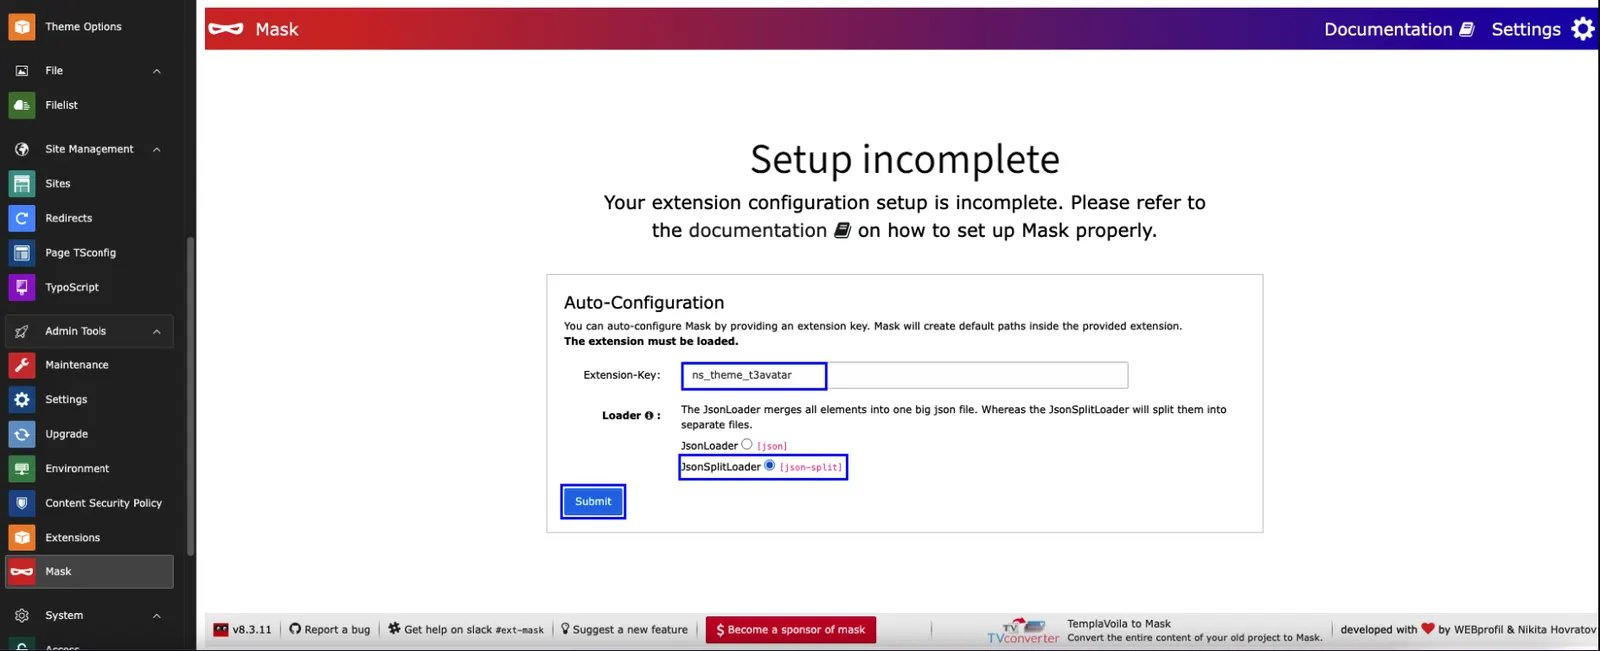 * **Step:1** Go to **Mask Module**
* **Step:2** Configure the template key ns\_theme\_t3avatar
* **Step:3** Select Json split-loader and click on submit
* **Step:1** Go to **Mask Module**
* **Step:2** Configure the template key ns\_theme\_t3avatar
* **Step:3** Select Json split-loader and click on submit
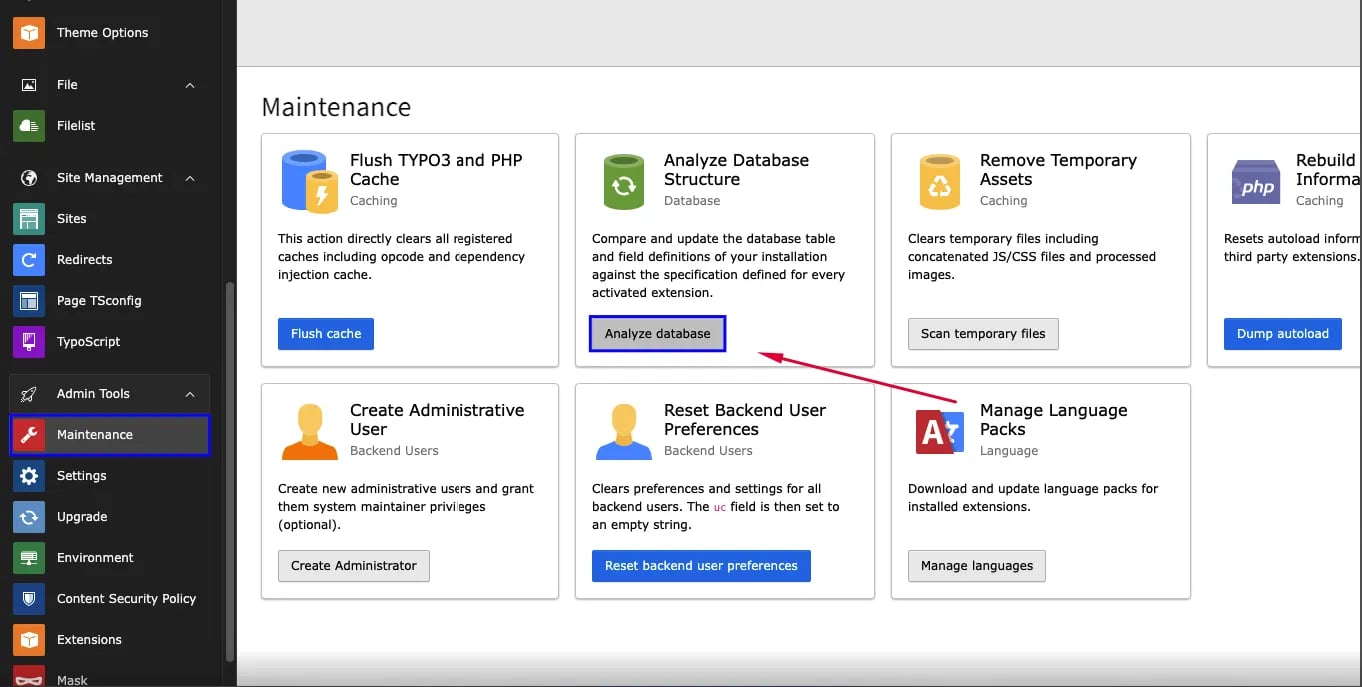 * **Step:4** Go to **Maintenance** Module
* **Step:5** Click on **Analyze Database**
* **Step:4** Go to **Maintenance** Module
* **Step:5** Click on **Analyze Database**
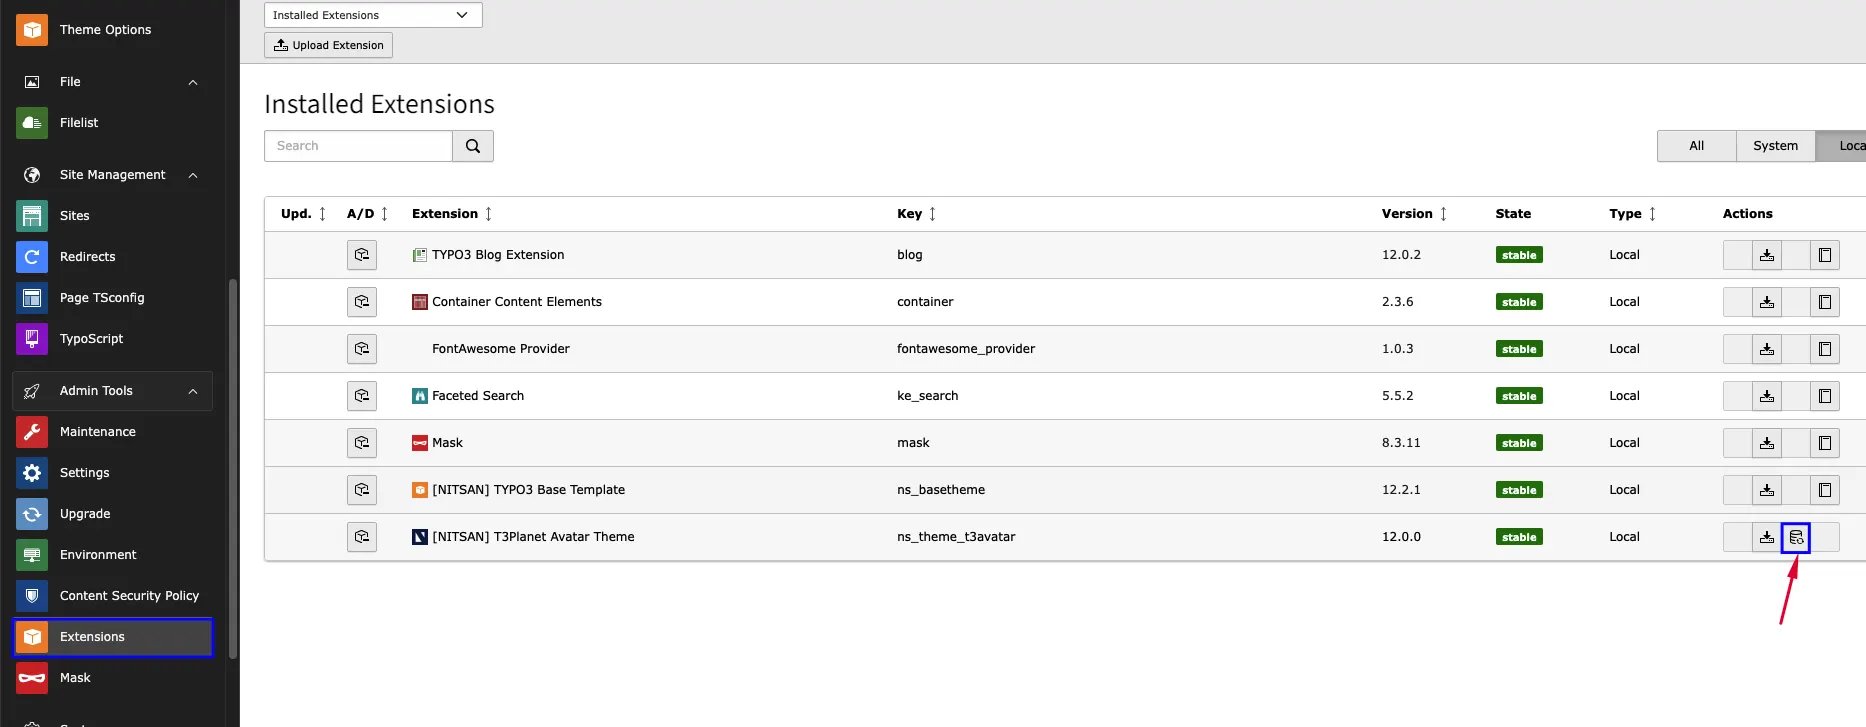 * **Step:6** Go to **Extension** module
* **Step:7** Search ns\_theme\_t3avatar,click on Import DB button and re-import Database
## Video Tutorials
* **Normal Template Installation** [https://www.youtube.com/watch?v=OCf-cbsV-3U](https://www.youtube.com/watch?v=OCf-cbsV-3U)
## Site Management
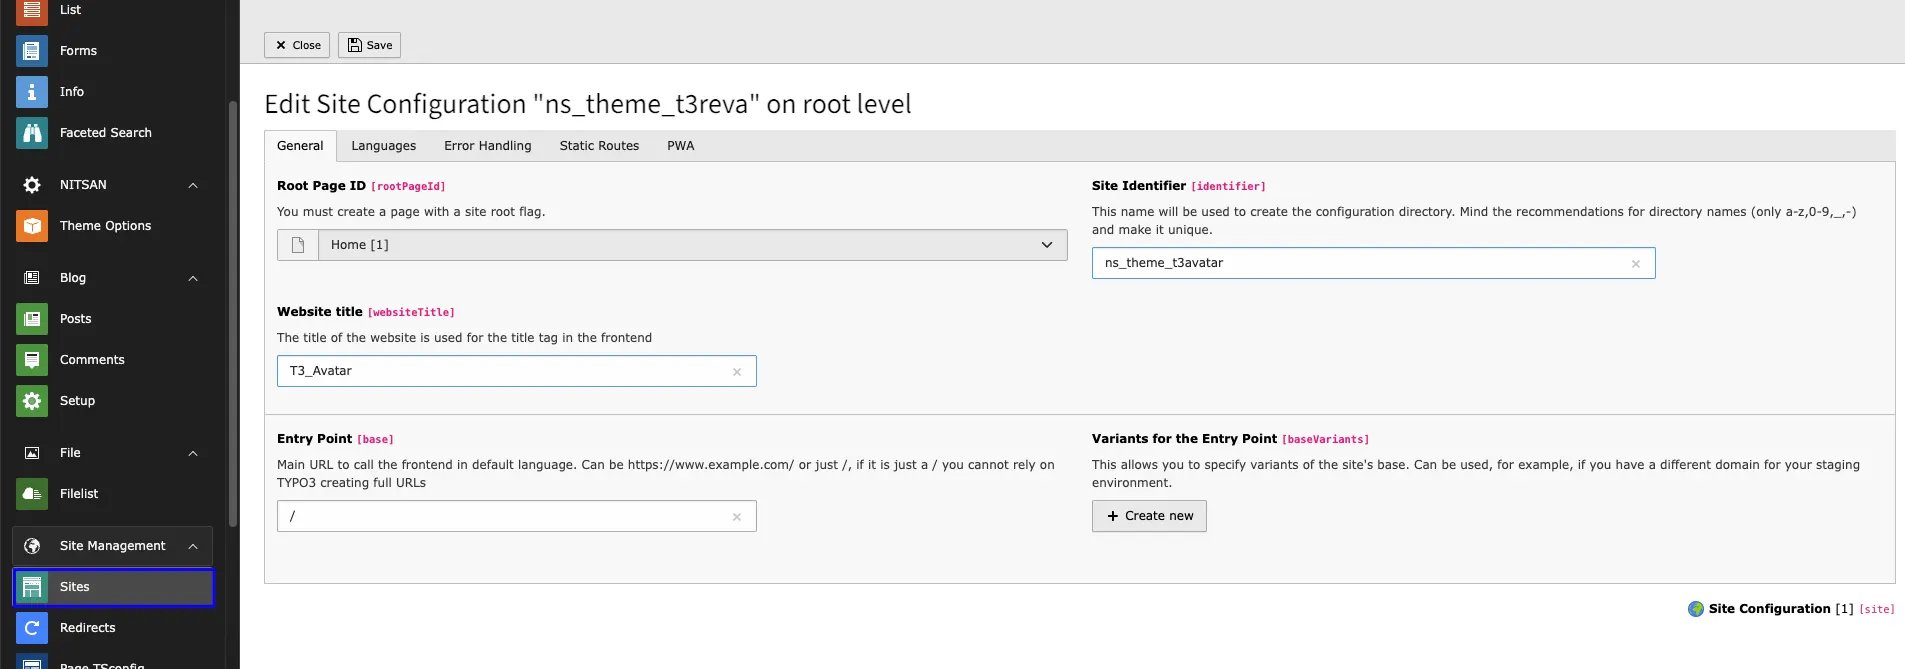
We have already provided Site Configuration and if you want to overwrite it then you can do it from Sites Module in Site Management.
* **Step:6** Go to **Extension** module
* **Step:7** Search ns\_theme\_t3avatar,click on Import DB button and re-import Database
## Video Tutorials
* **Normal Template Installation** [https://www.youtube.com/watch?v=OCf-cbsV-3U](https://www.youtube.com/watch?v=OCf-cbsV-3U)
## Site Management
We have already provided Site Configuration and if you want to overwrite it then you can do it from Sites Module in Site Management.
 ## Page Tree
Once you install your TYPO3 Template extension, it will automatically generate "Page tree" in your TYPO3 backend with all the pages and content.
## Page Tree
Once you install your TYPO3 Template extension, it will automatically generate "Page tree" in your TYPO3 backend with all the pages and content.
 After installation, Most important is to set correct ID's of menu/pages to create proper menu and content. Sometime TYPO3 mis-configured Page-ID, Please go to General > Menu and Pages Settings and set appropriate page-ids.