> ## Documentation Index
> Fetch the complete documentation index at: https://docs.t3planet.de/en/latest/llms.txt
> Use this file to discover all available pages before exploring further.
# Configuration
> - Step 1: Go to https://disqus.com - Step 2: Navigate to Admin page.
## Get Shortname from Disqus.com
* **Step 1:** Go to [https://disqus.com](https://disqus.com)
* **Step 2:** Navigate to Admin page.
* **Step 3:** Create a site on Disqus.
* **Step 4:** Go to the Settings of your Disqus site.
* **Step 5:** Switch to the General Settings tab. There you would find the short name for your website.
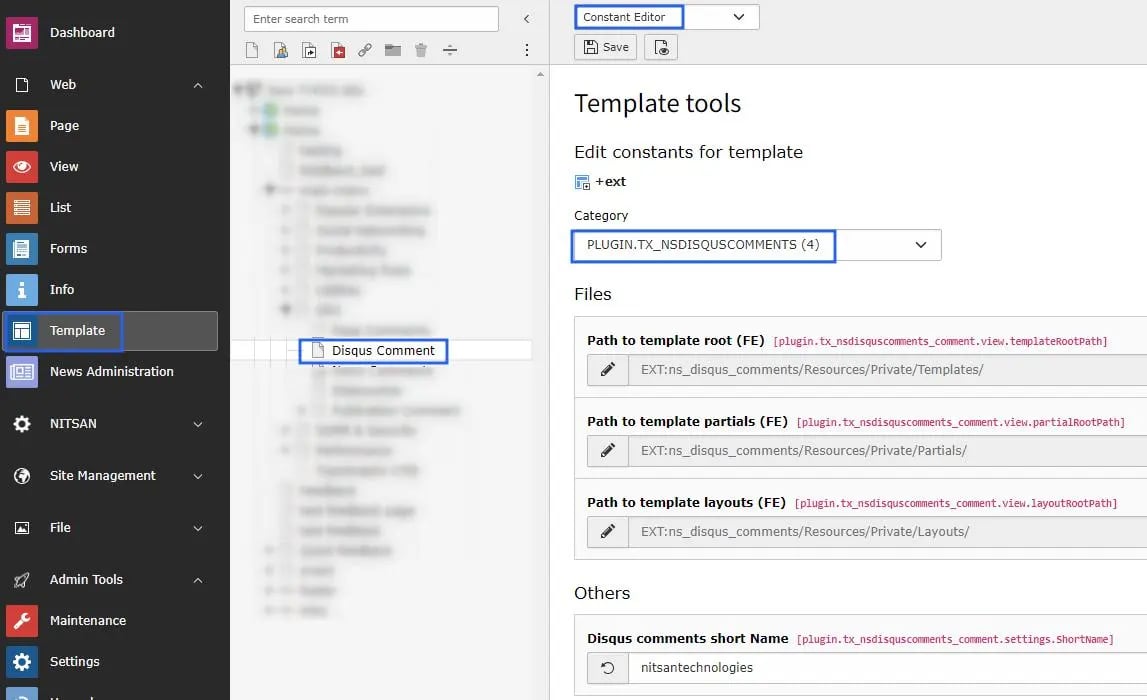
 * **Step 6:** Set this Shortname at TYPO3 constant editor, Check below screenshot.
 ## Add Disqus Comment Plugin
* **Step 1:** Go to the page where you want to add Disqus comments
* **Step 2:** Click on the Add new element button. Select \[NITSAN] Disqus Comment element from the Plugin tab.
## Add Disqus Comment Plugin
* **Step 1:** Go to the page where you want to add Disqus comments
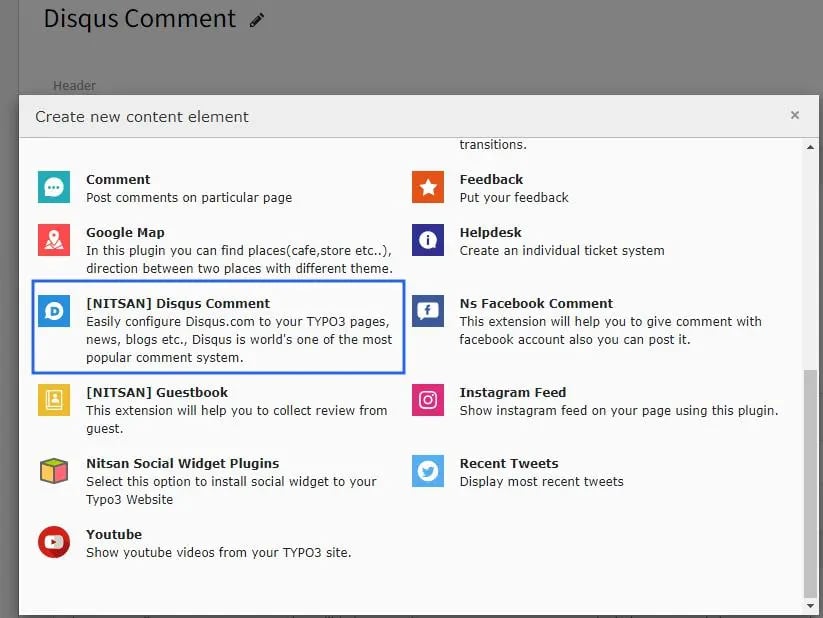
* **Step 2:** Click on the Add new element button. Select \[NITSAN] Disqus Comment element from the Plugin tab.
 * **Step 3:** Save the Plugin. The Disqus element will be displayed in front-end.