> ## Documentation Index
> Fetch the complete documentation index at: https://docs.t3planet.de/en/latest/llms.txt
> Use this file to discover all available pages before exploring further.
# Installation
# Installation
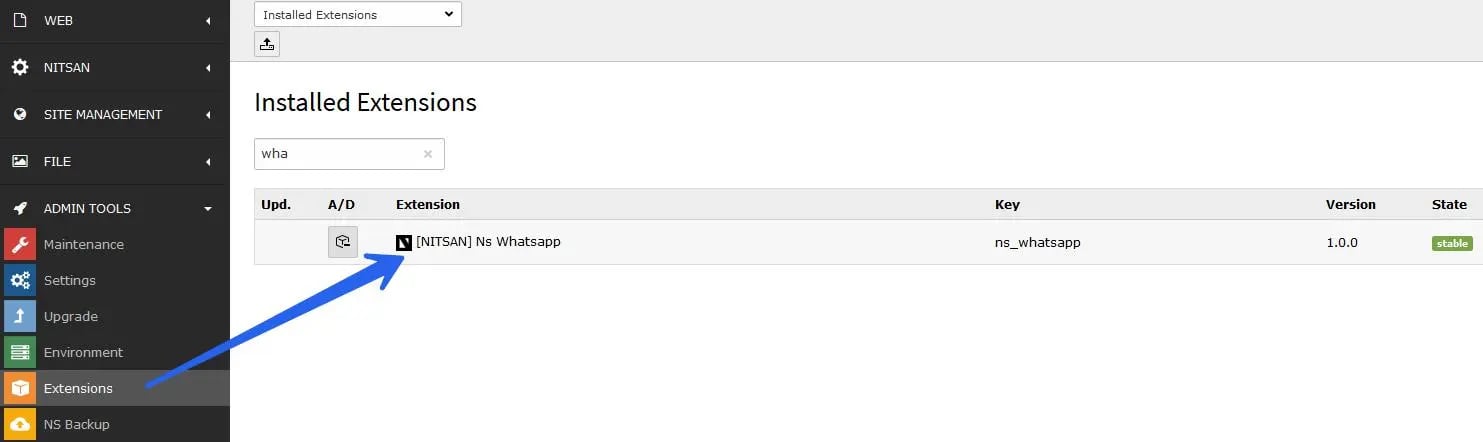
Just install this extension the usual way like any other TYPO3 extension.
## For Premium Version - License Activation
To activate license and install this premium TYPO3 product, Please refer this documentation [License documentation](/en/latest/en/latest/License/Index)
## For Free Version
In the TYPO3 backend you can use the extension manager (EM).
Switch to the module “Extension Manager”.
Get the extension
Get it from the Extension Manager: Press the “Retrieve/Update” button and search for the extension key ns\_whatsapp and import the extension from the repository.
Get it from typo3.org: You can always get the current version from [https://extensions.typo3.org/extension/ns\_whatsapp/](https://extensions.typo3.org/extension/ns_whatsapp/) by downloading either the t3x or zip version. Upload the file afterwards in the Extension Manager.
 Switch to the root page of your site.
Switch to the Template/TypoScript module and select Edit TypoScript Record.
Click the link Edit the whole template record and switch to the tab Includes.
Select ‘Nitsan Whatsapp at the field Include static (from extensions):
Include ‘Nitsan Whatsapp at the last place.
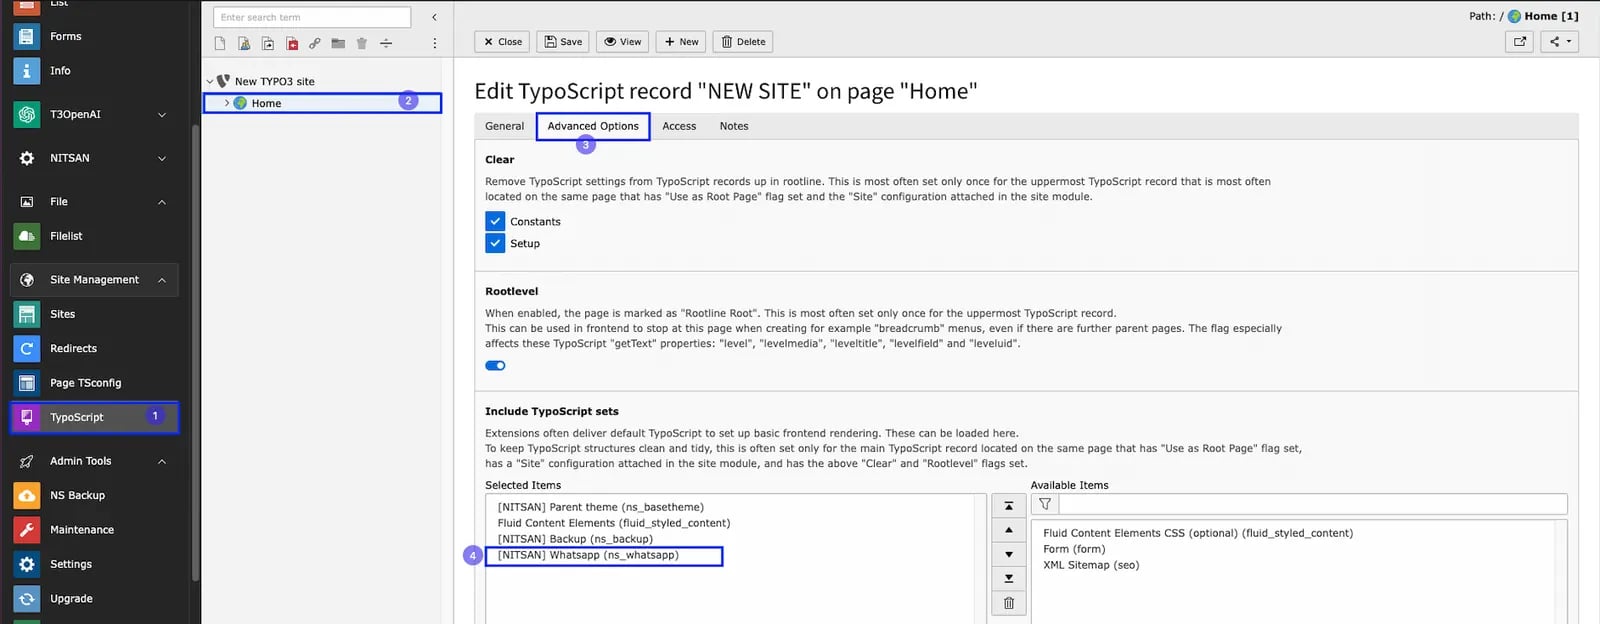
Switch to the root page of your site.
Switch to the Template/TypoScript module and select Edit TypoScript Record.
Click the link Edit the whole template record and switch to the tab Includes.
Select ‘Nitsan Whatsapp at the field Include static (from extensions):
Include ‘Nitsan Whatsapp at the last place.
 ## How to Install TYPO3 Extension ns\_whatsapp
**Extension Installation Via without Composer mode**
[https://www.youtube.com/watch?v=SN5HoFQcDM4](https://www.youtube.com/watch?v=SN5HoFQcDM4)
**Extension Via Composer**
[https://www.youtube.com/watch?v=\_7ILu4lwU-k](https://www.youtube.com/watch?v=_7ILu4lwU-k)
***
## Additional content from live docs
## Activate the TypoScript
The extension ships some static TypoScript code which needs to be included.
**Step 1.** Switch to the root page of your site.
**Step 2.** Switch to the Template/TypoScript module and select Edit TypoScript Record.
**Step 3.** Click the link Edit the whole template record and switch to the tab Includes.
**Step 4.** Select ‘Nitsan Whatsapp at the field Include static (from extensions):
**Step 5.** Include ‘Nitsan Whatsapp at the last place.
## How to Install TYPO3 Extension ns\_whatsapp
**Extension Installation Via without Composer mode**
[https://www.youtube.com/watch?v=SN5HoFQcDM4](https://www.youtube.com/watch?v=SN5HoFQcDM4)
**Extension Via Composer**
[https://www.youtube.com/watch?v=\_7ILu4lwU-k](https://www.youtube.com/watch?v=_7ILu4lwU-k)
***
## Additional content from live docs
## Activate the TypoScript
The extension ships some static TypoScript code which needs to be included.
**Step 1.** Switch to the root page of your site.
**Step 2.** Switch to the Template/TypoScript module and select Edit TypoScript Record.
**Step 3.** Click the link Edit the whole template record and switch to the tab Includes.
**Step 4.** Select ‘Nitsan Whatsapp at the field Include static (from extensions):
**Step 5.** Include ‘Nitsan Whatsapp at the last place.