

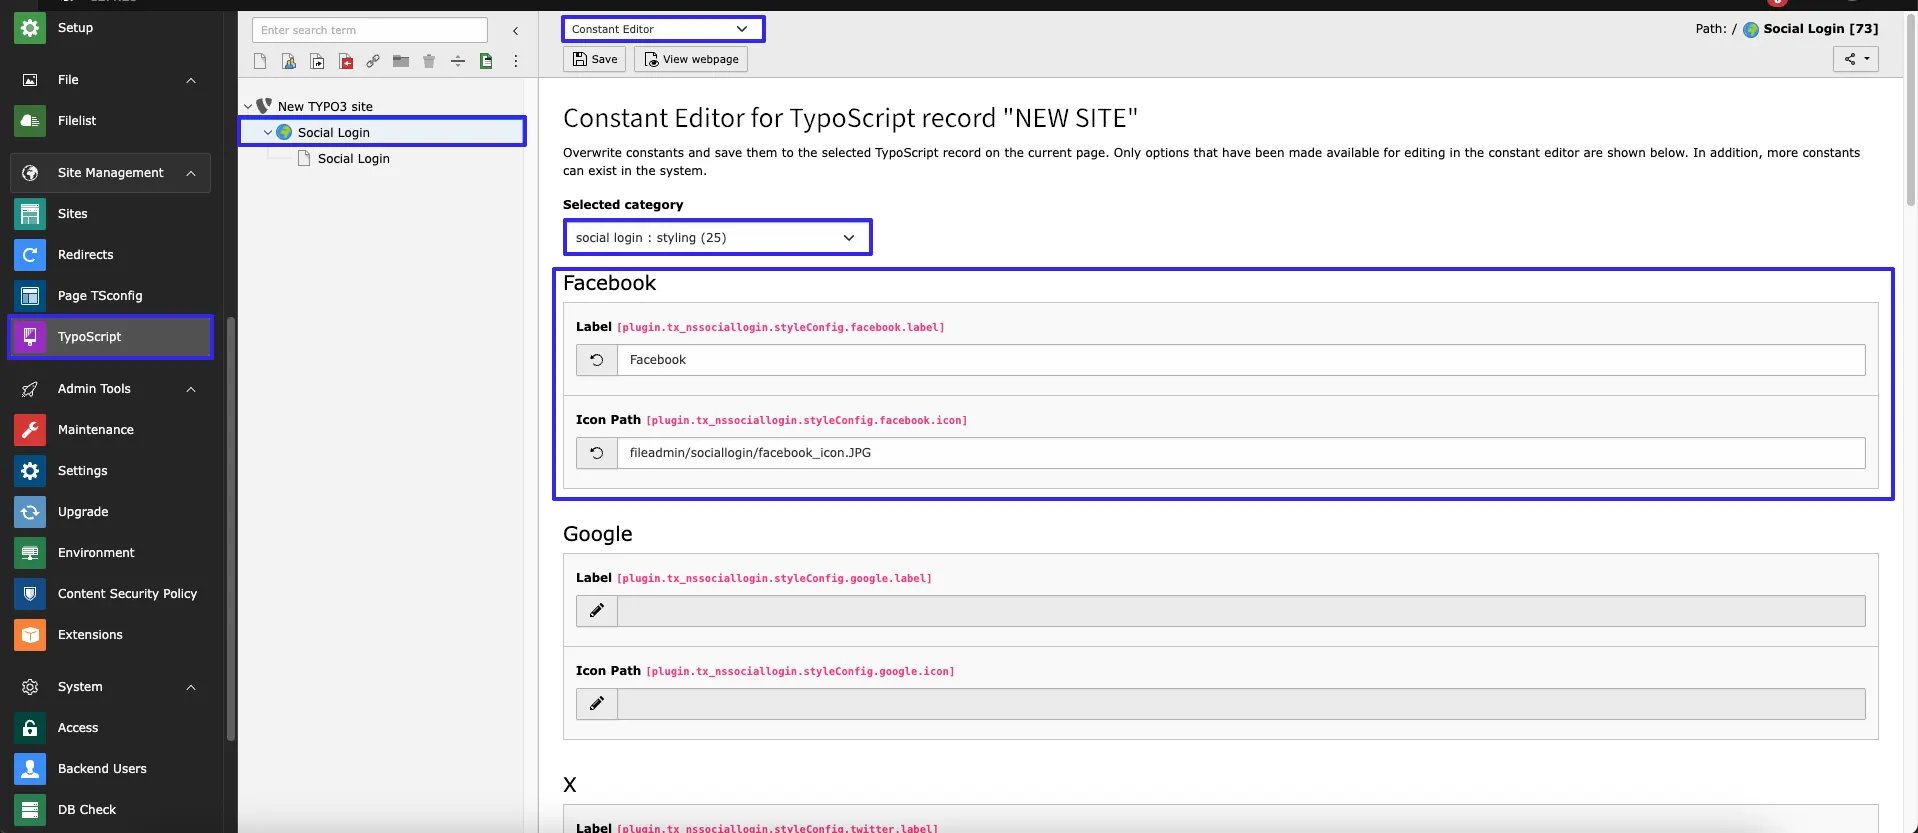
- Step 1: Go to TypoScript module
- Step 2: Select root page.
- Step 3: Select Constant Editor from drop-down.
- Step 3: Select Constant Editor > social login : styling
- Step 4: Set label and iconpath for the social login provider.you can set for all providers or for specific providers.
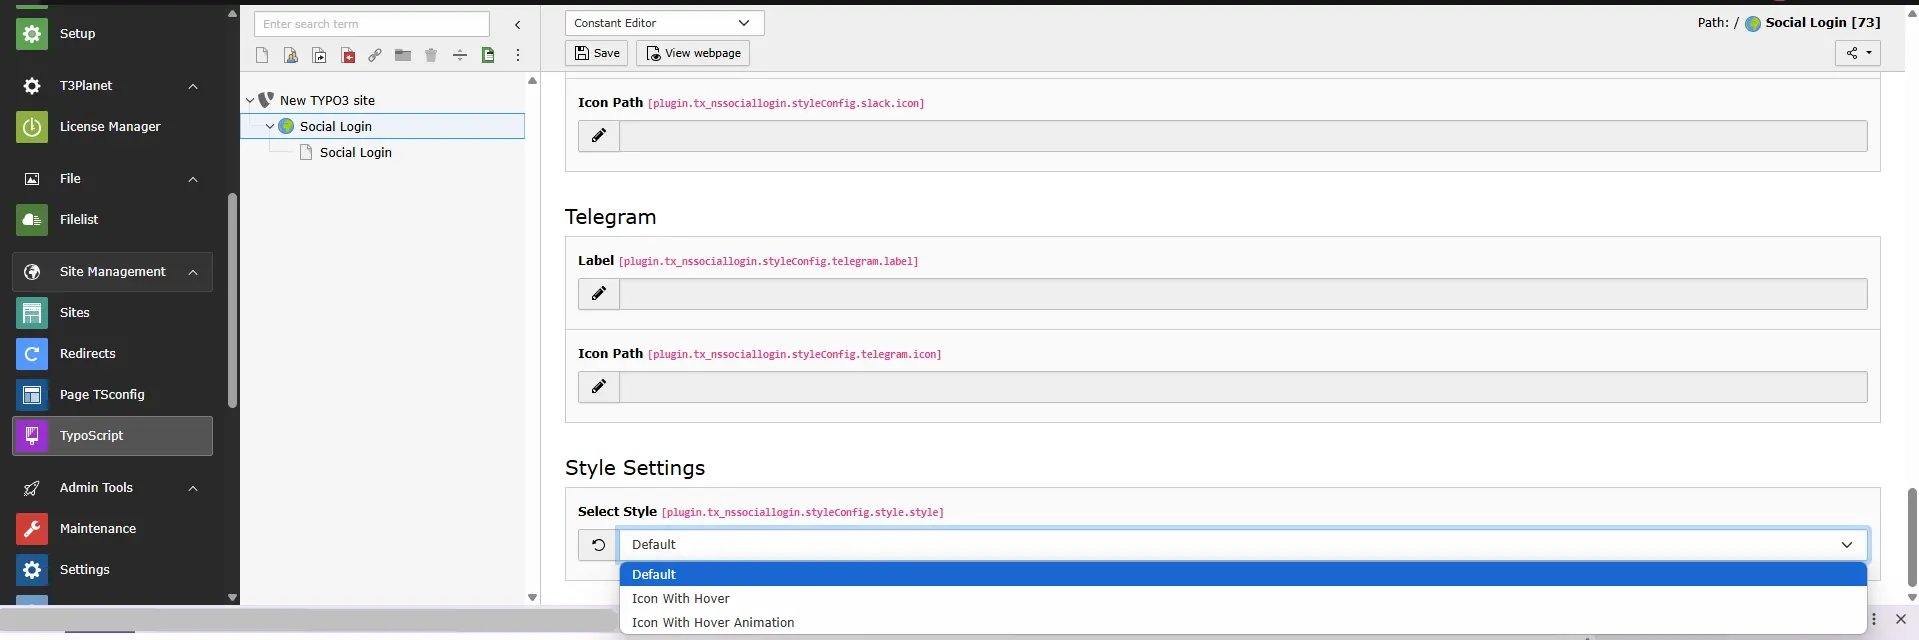
Provider Configuration
To configure the extension, follow these steps: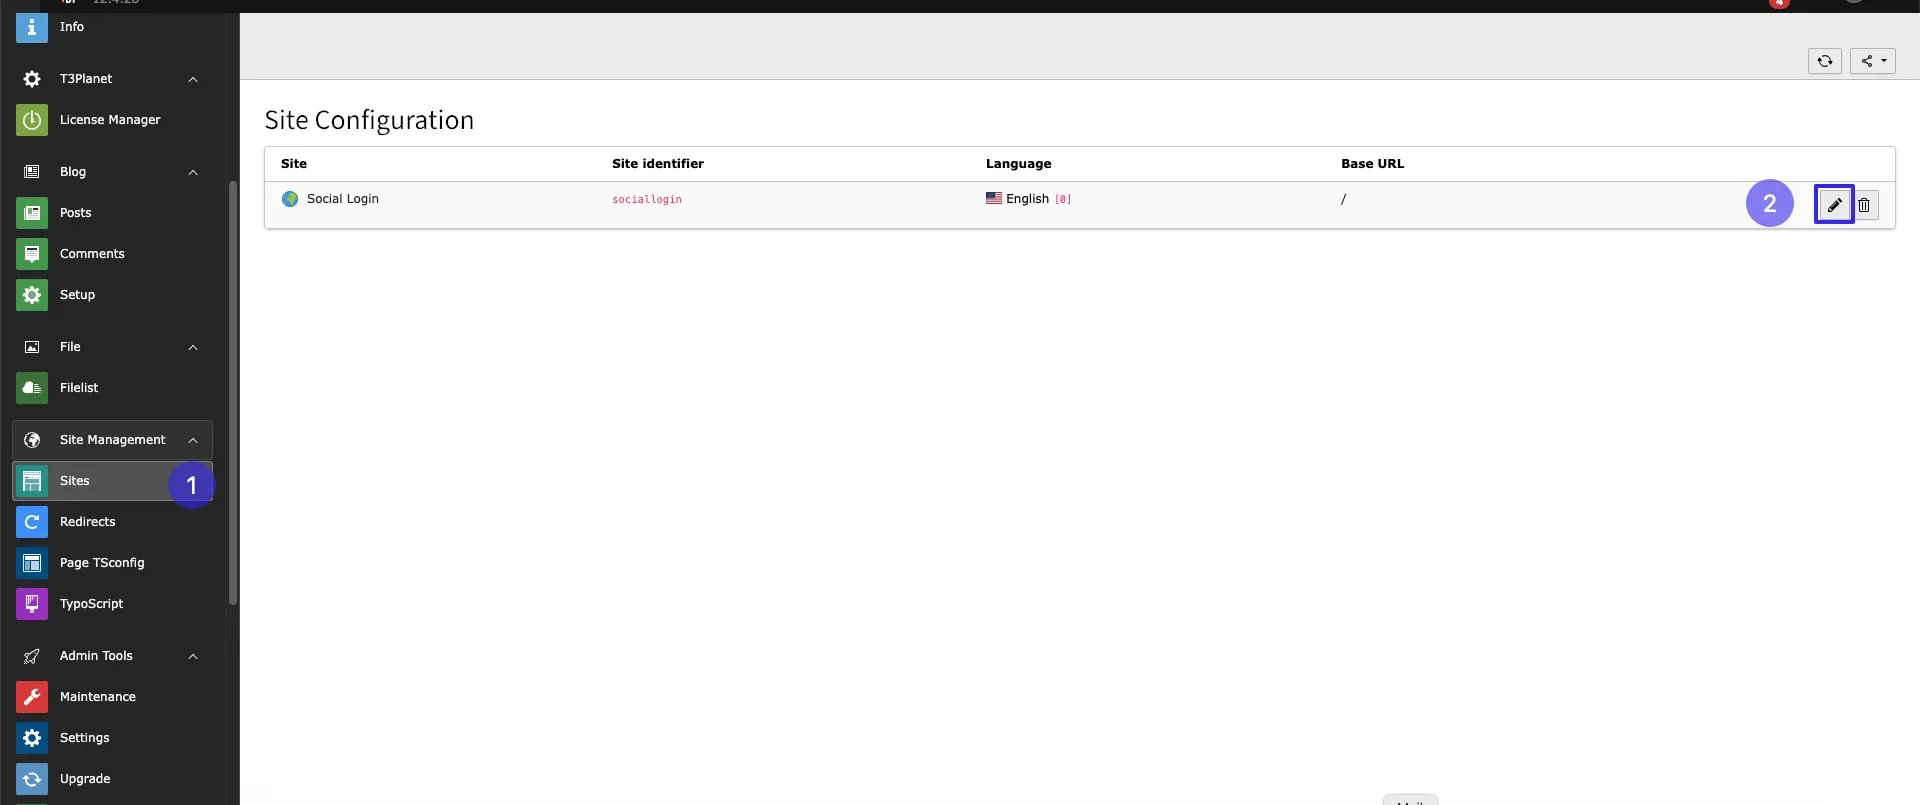
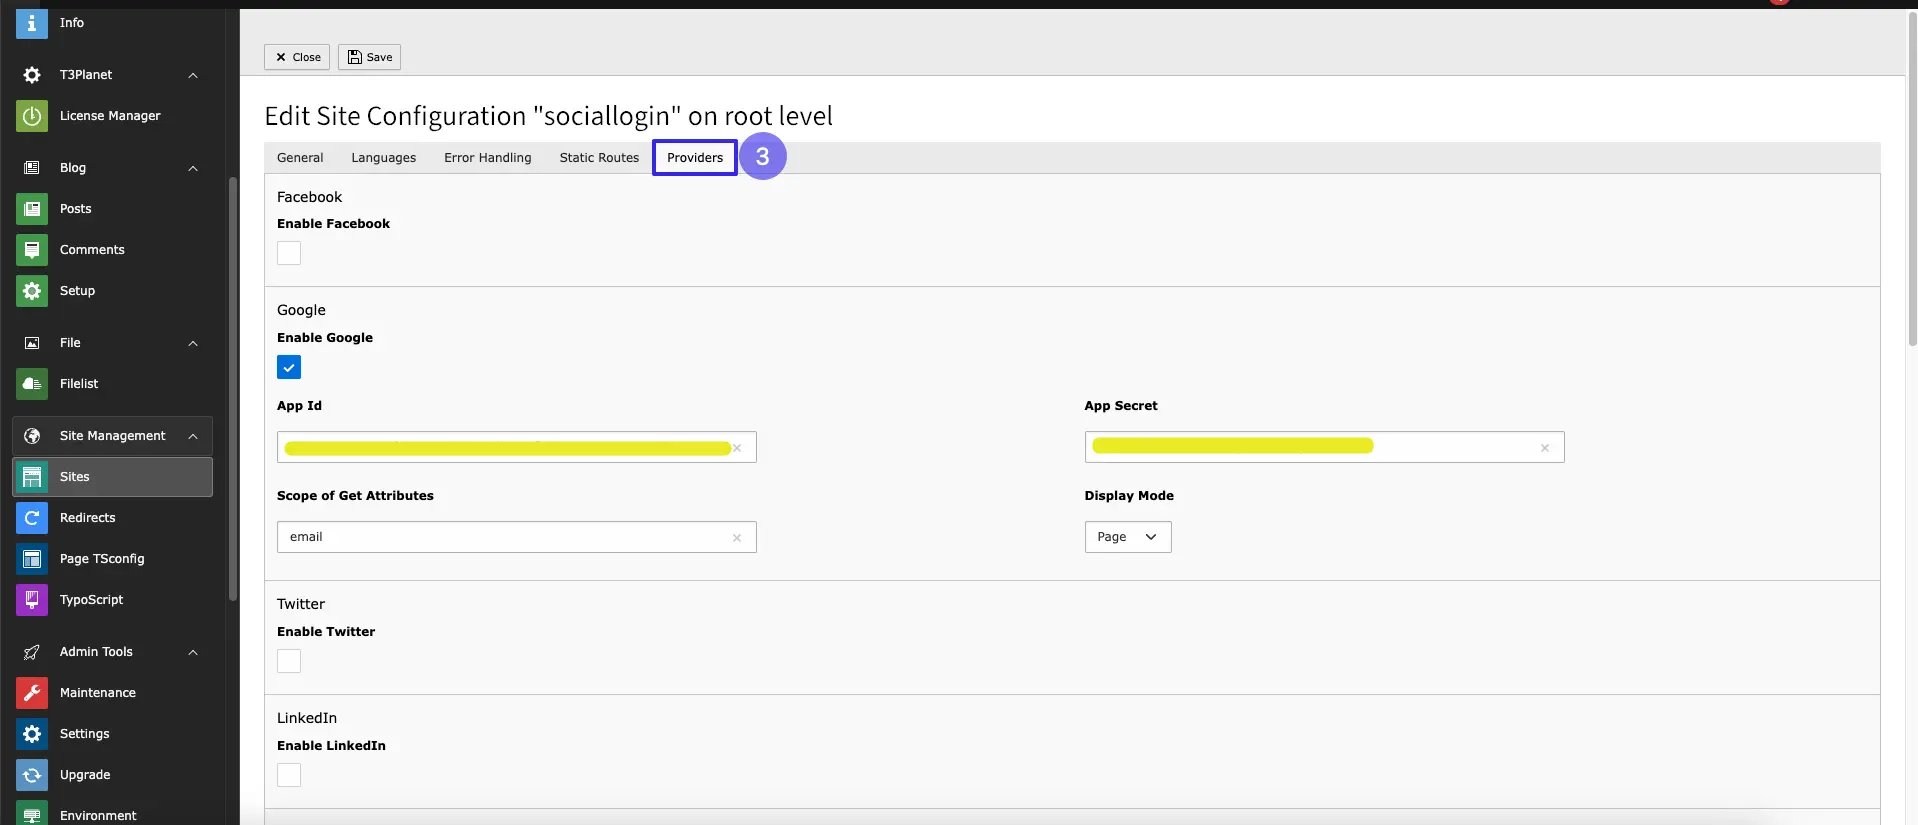
- Step 1: Navigate to Site Management > Sites Configuration in the TYPO3 backend.
- Step 2: Edit your selected site configuration and open the Providers tab.
Additional Configuration
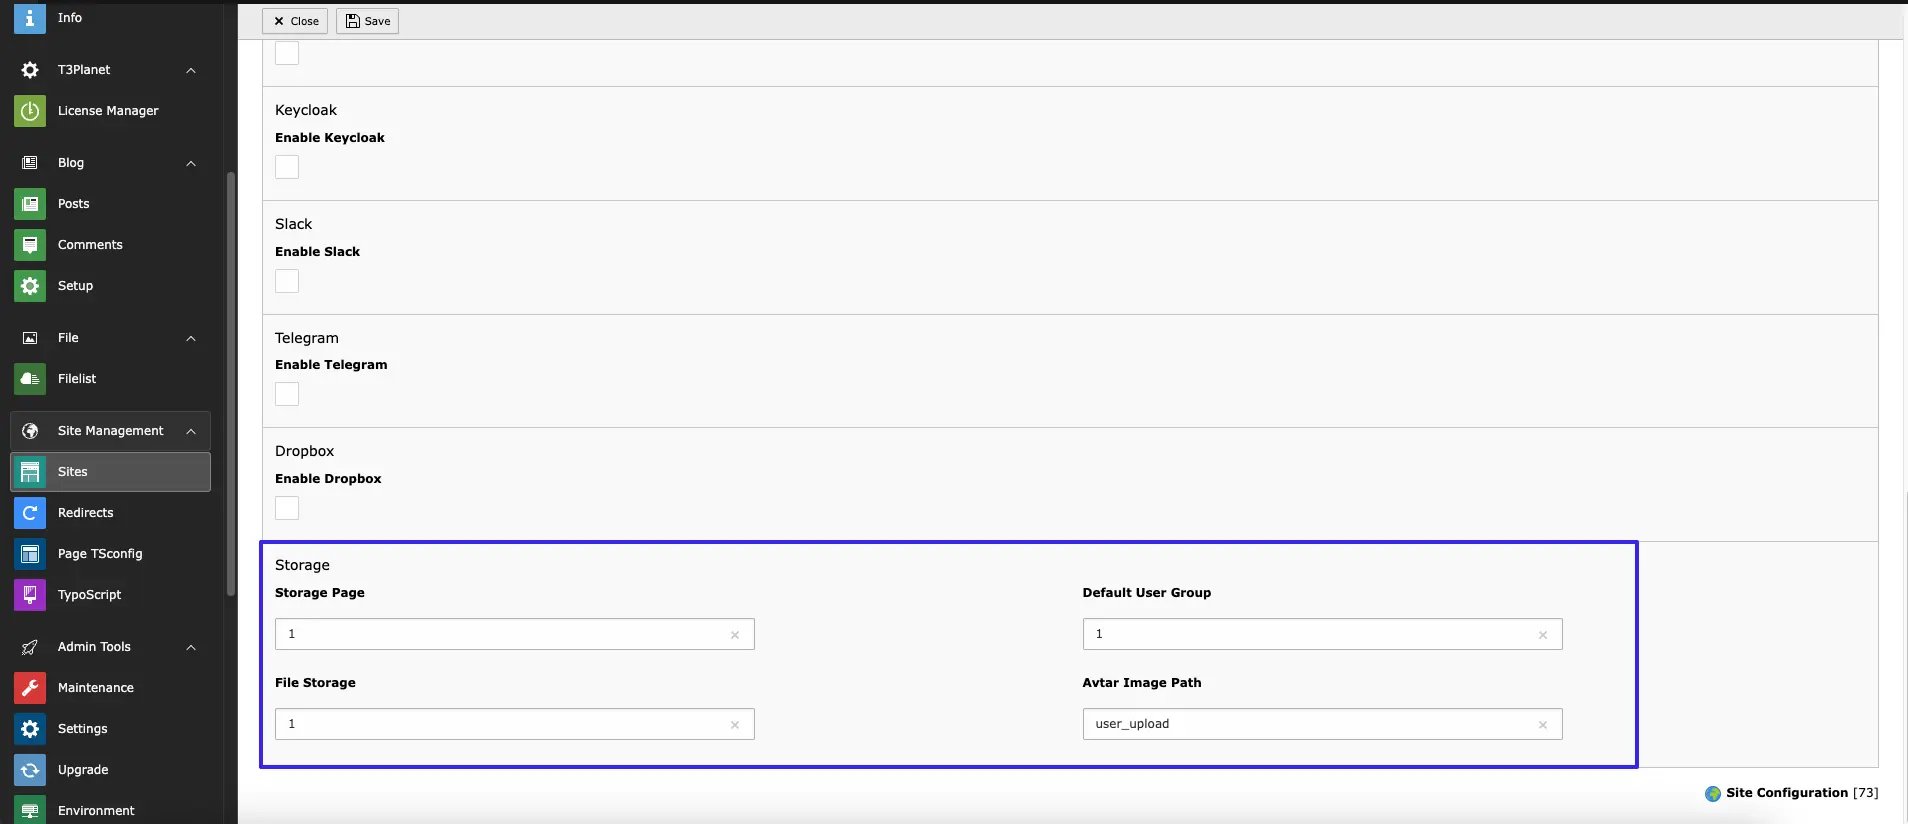
- Storage Page: Set up file storage as per requirement.
- Default User Group: Assign the default user group for new users.
- File Storage: Define the folder where frontend user records will be stored.
- Avatar Image Path: Set the path for storing user avatar images.
Google Credential Setup
- Visit https://console.cloud.google.com/
- Create a new project
- Navigate to APIs & Services > Credentials
- Click Create Credentials > OAuth Client ID
- Choose Web Application
-
Add the following:
- Authorized JavaScript Origins: e.g.,
https://yourdomain.com - Authorized Redirect URIs: e.g.,
https://yourdomain.com/oauth
- Authorized JavaScript Origins: e.g.,
-
Under OAuth Consent Screen, add your domain (without
http://orhttps://) to the Authorized Domains section
Plugin Configuration
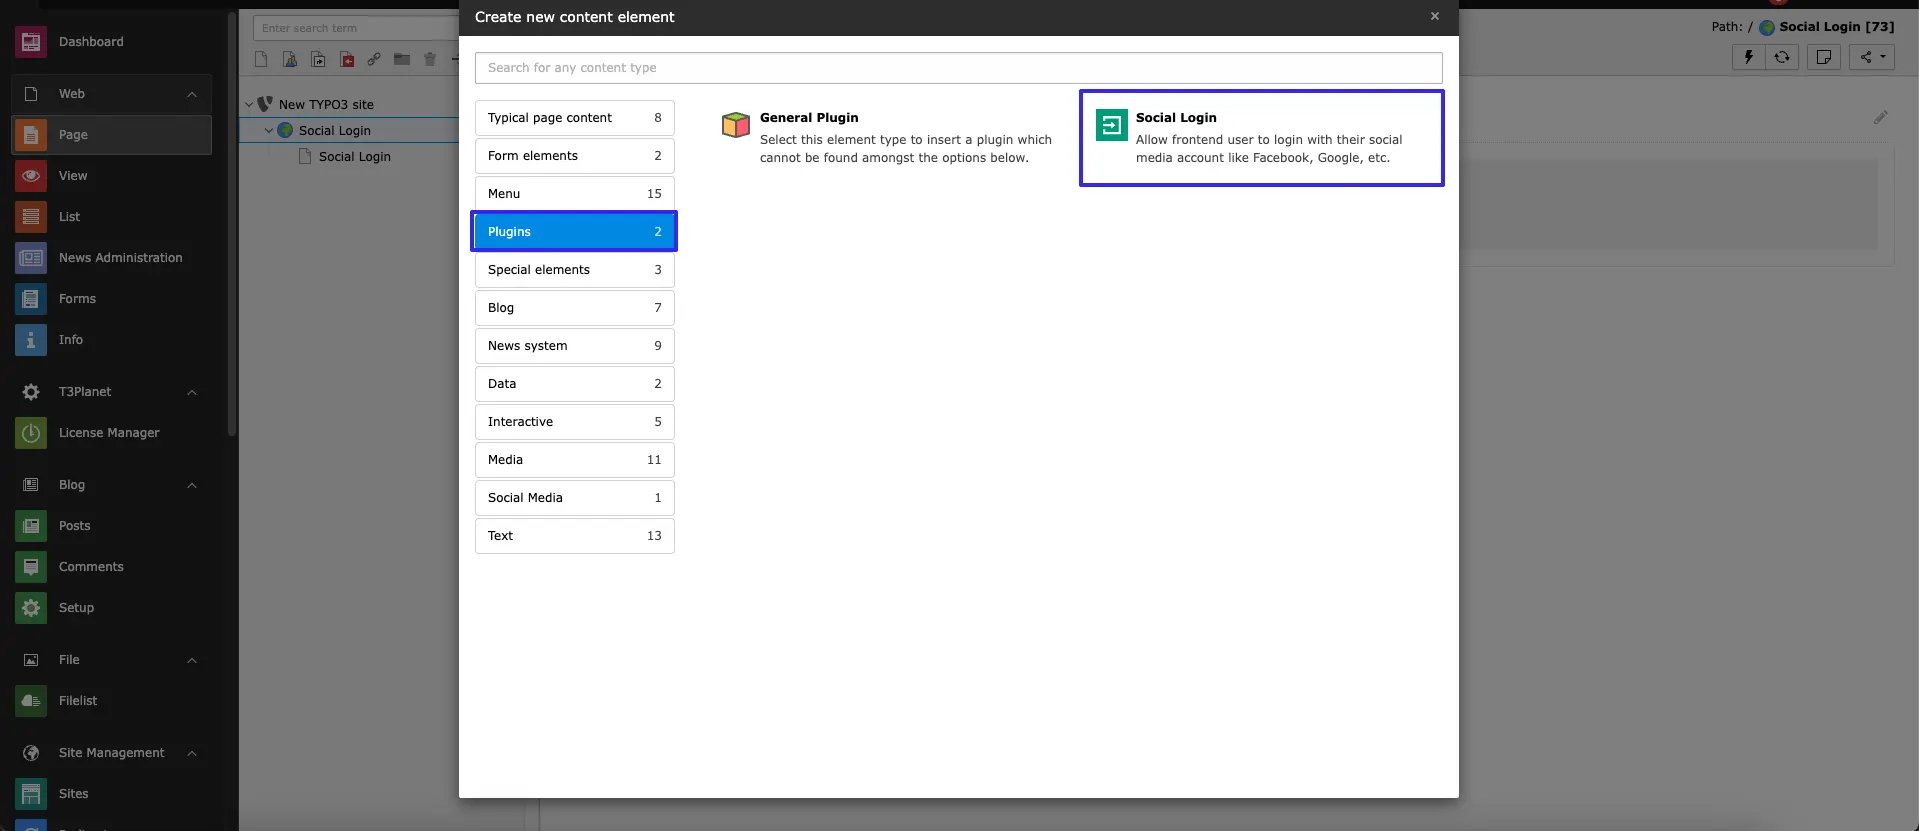
- step 1: Go to the page where you want to add the plugin.
- step 2: Click on the plus icon to add a new content element.
- step 3: Search for the plugin by typing “Social Login” in the search bar.
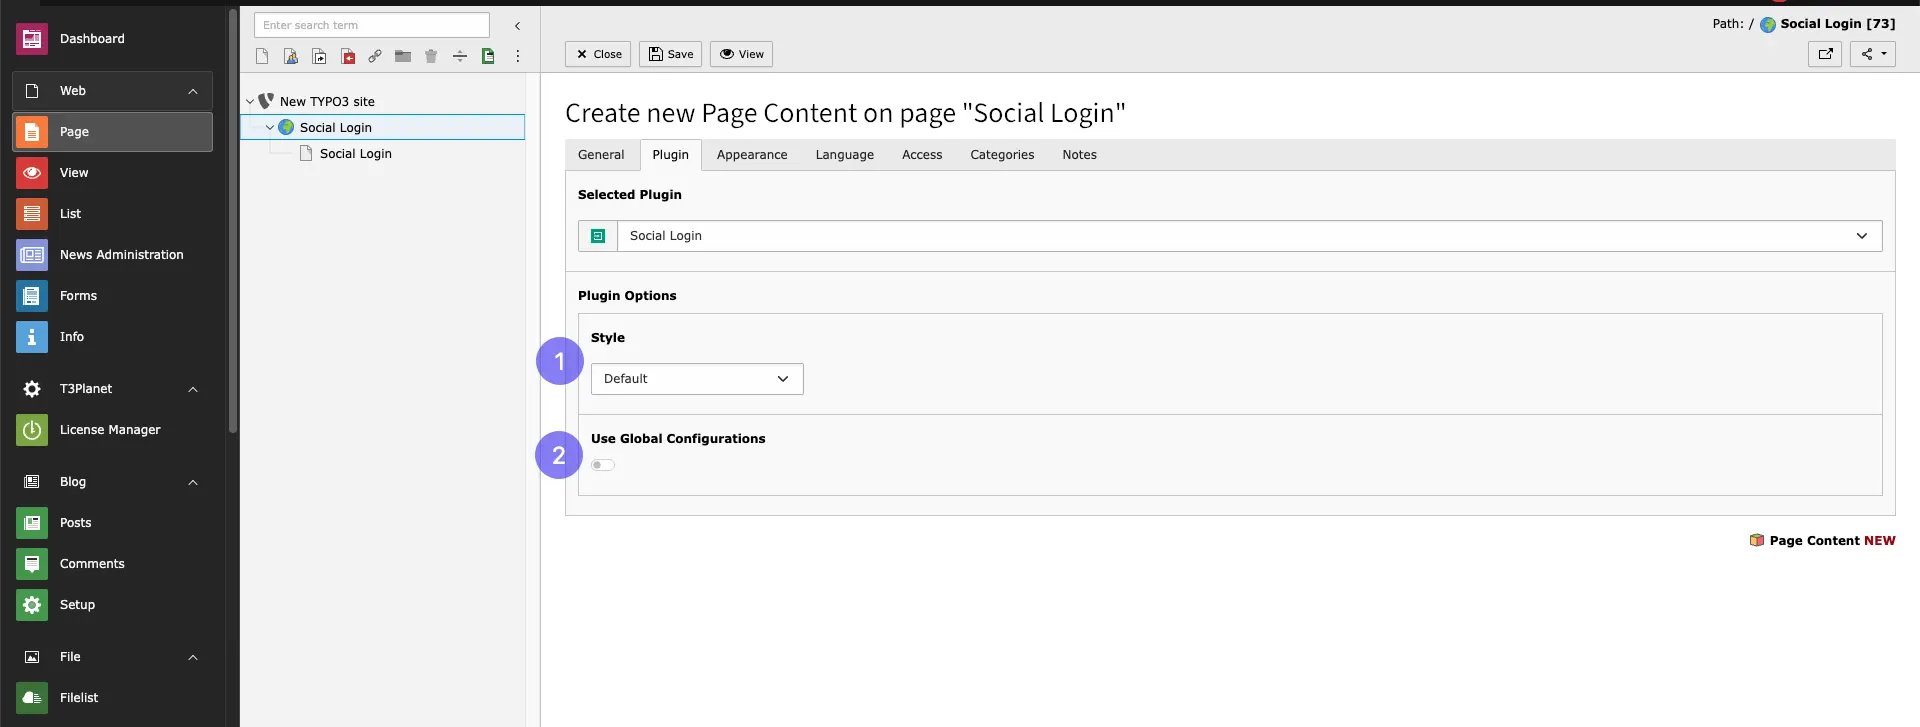
- step 4: select styles from the list of available styles or enable global styles.
Figures
