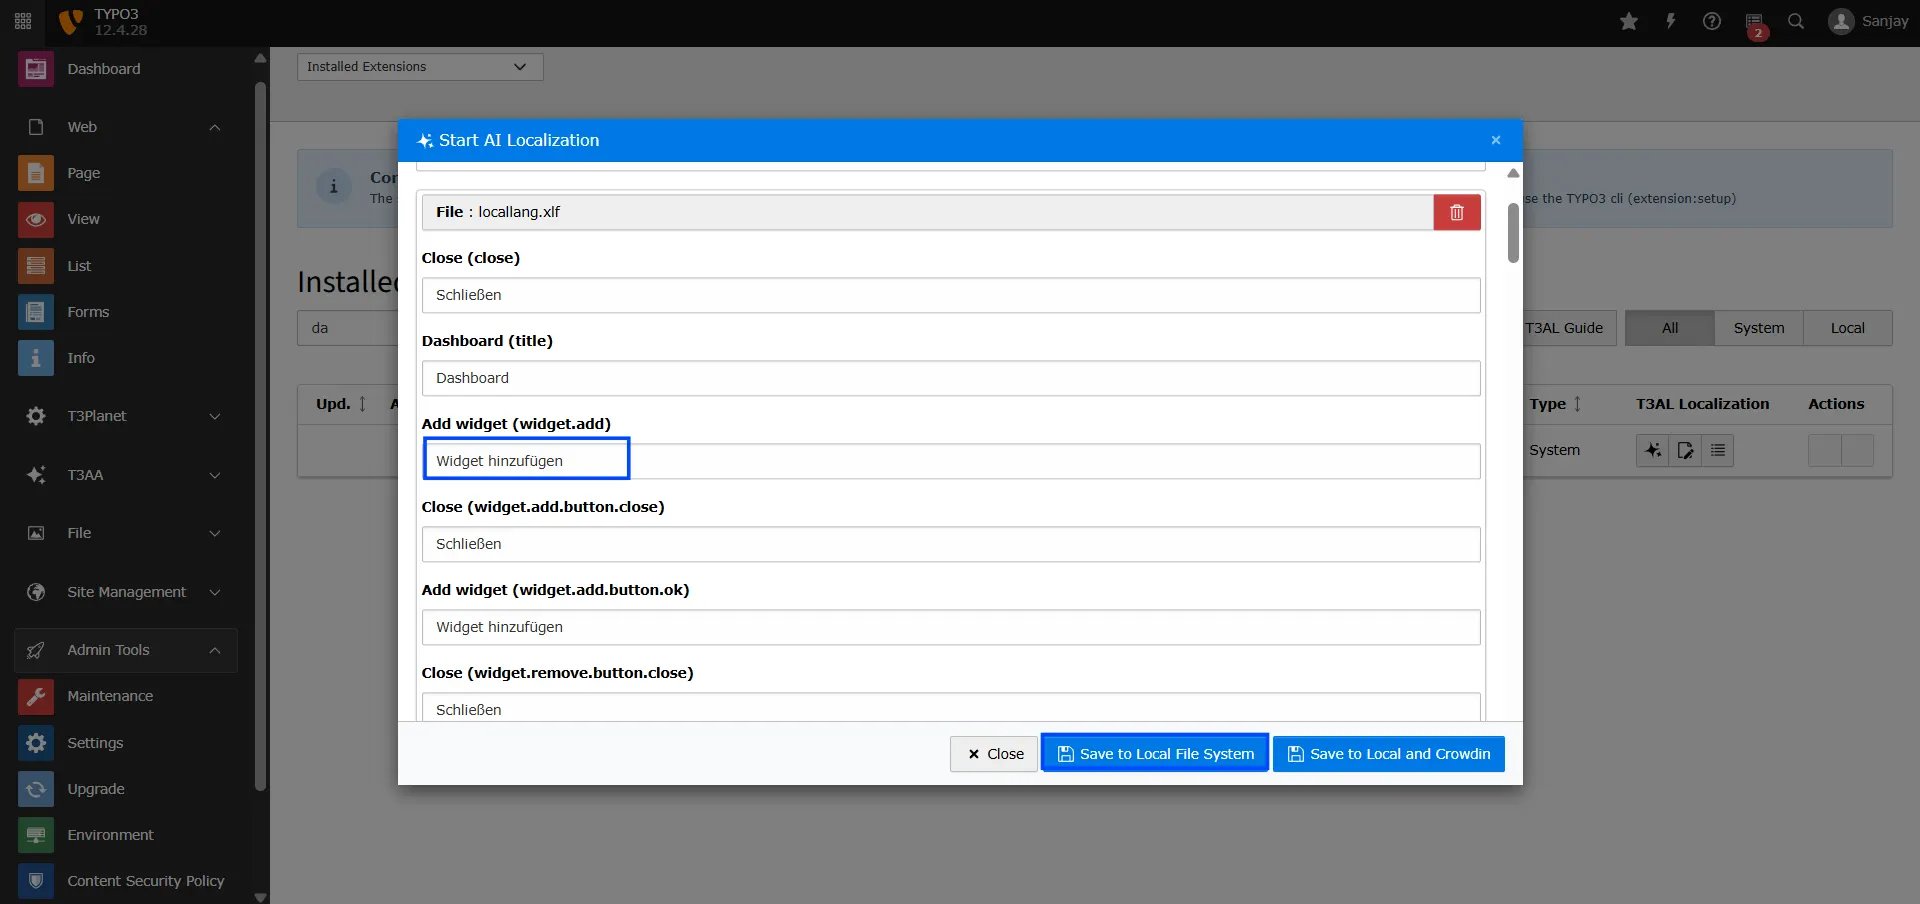
Initial Steps
Step 1: Go to the “Extension Manager” in your TYPO3 backend. Step 2: From the dropdown menu, choose “Get the extension.” Step 3: Find and add your TYPO3 extension from the list. Step 4: Once added, you’ll see an AI icon—click it to start translating your XLIFF files with just one click.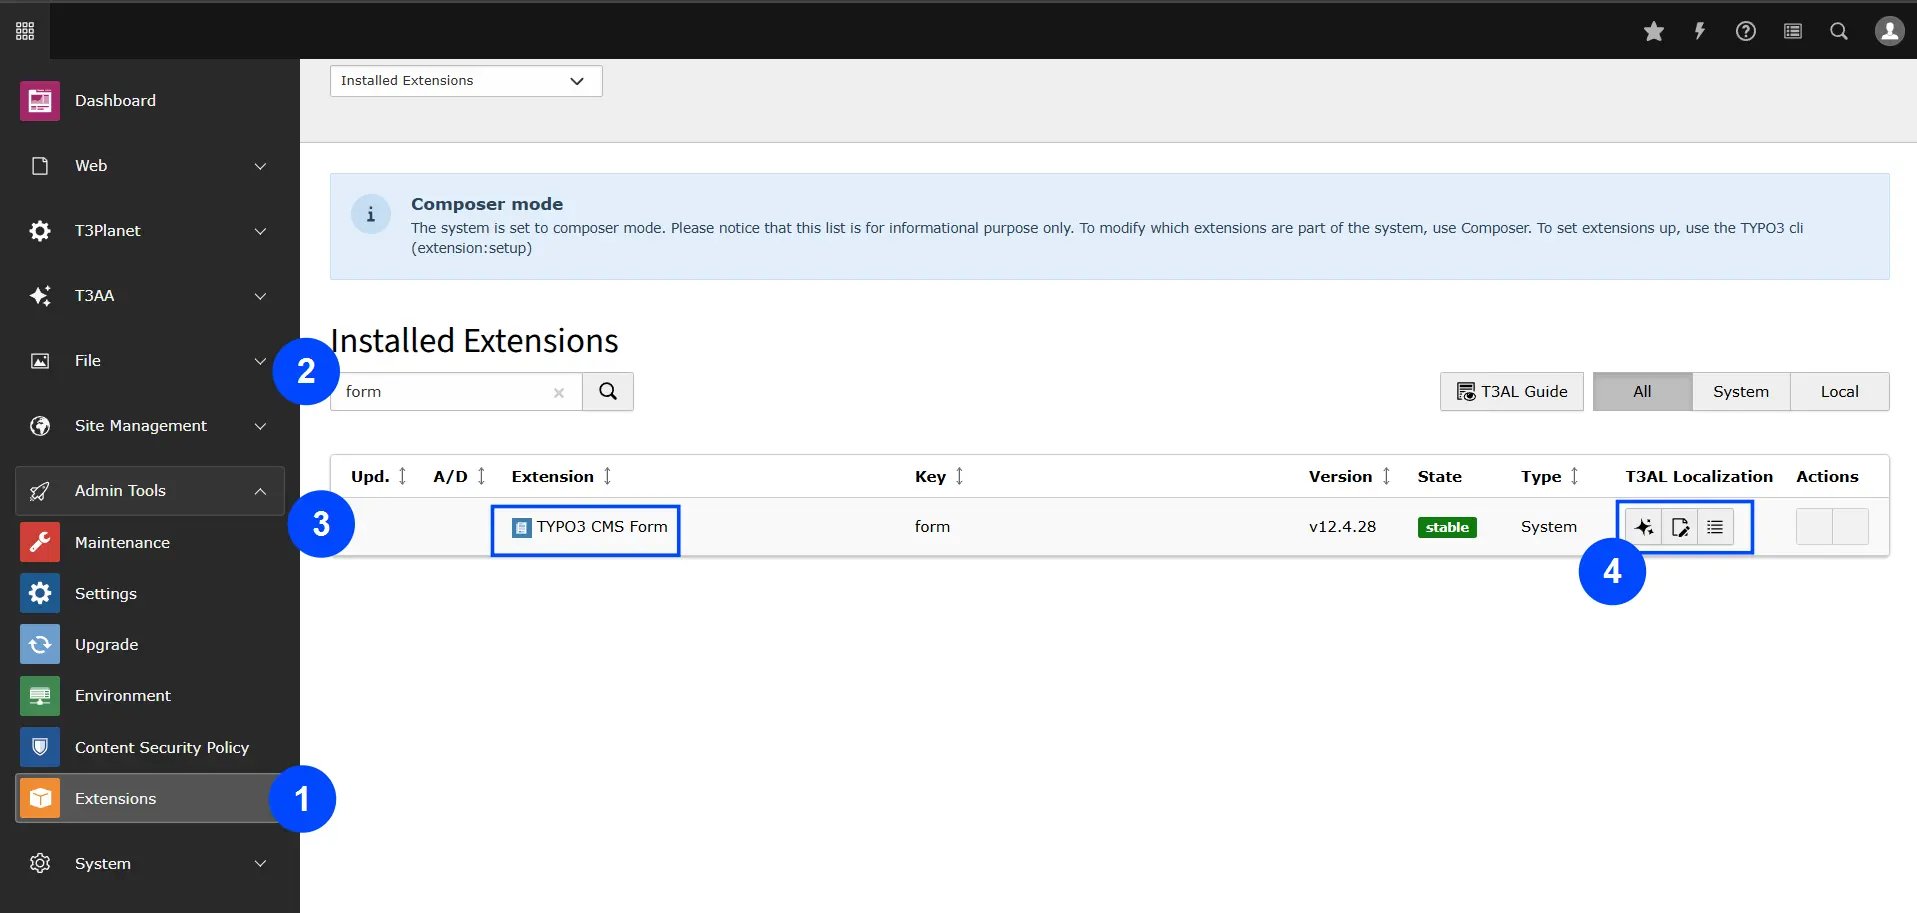
Translation Steps
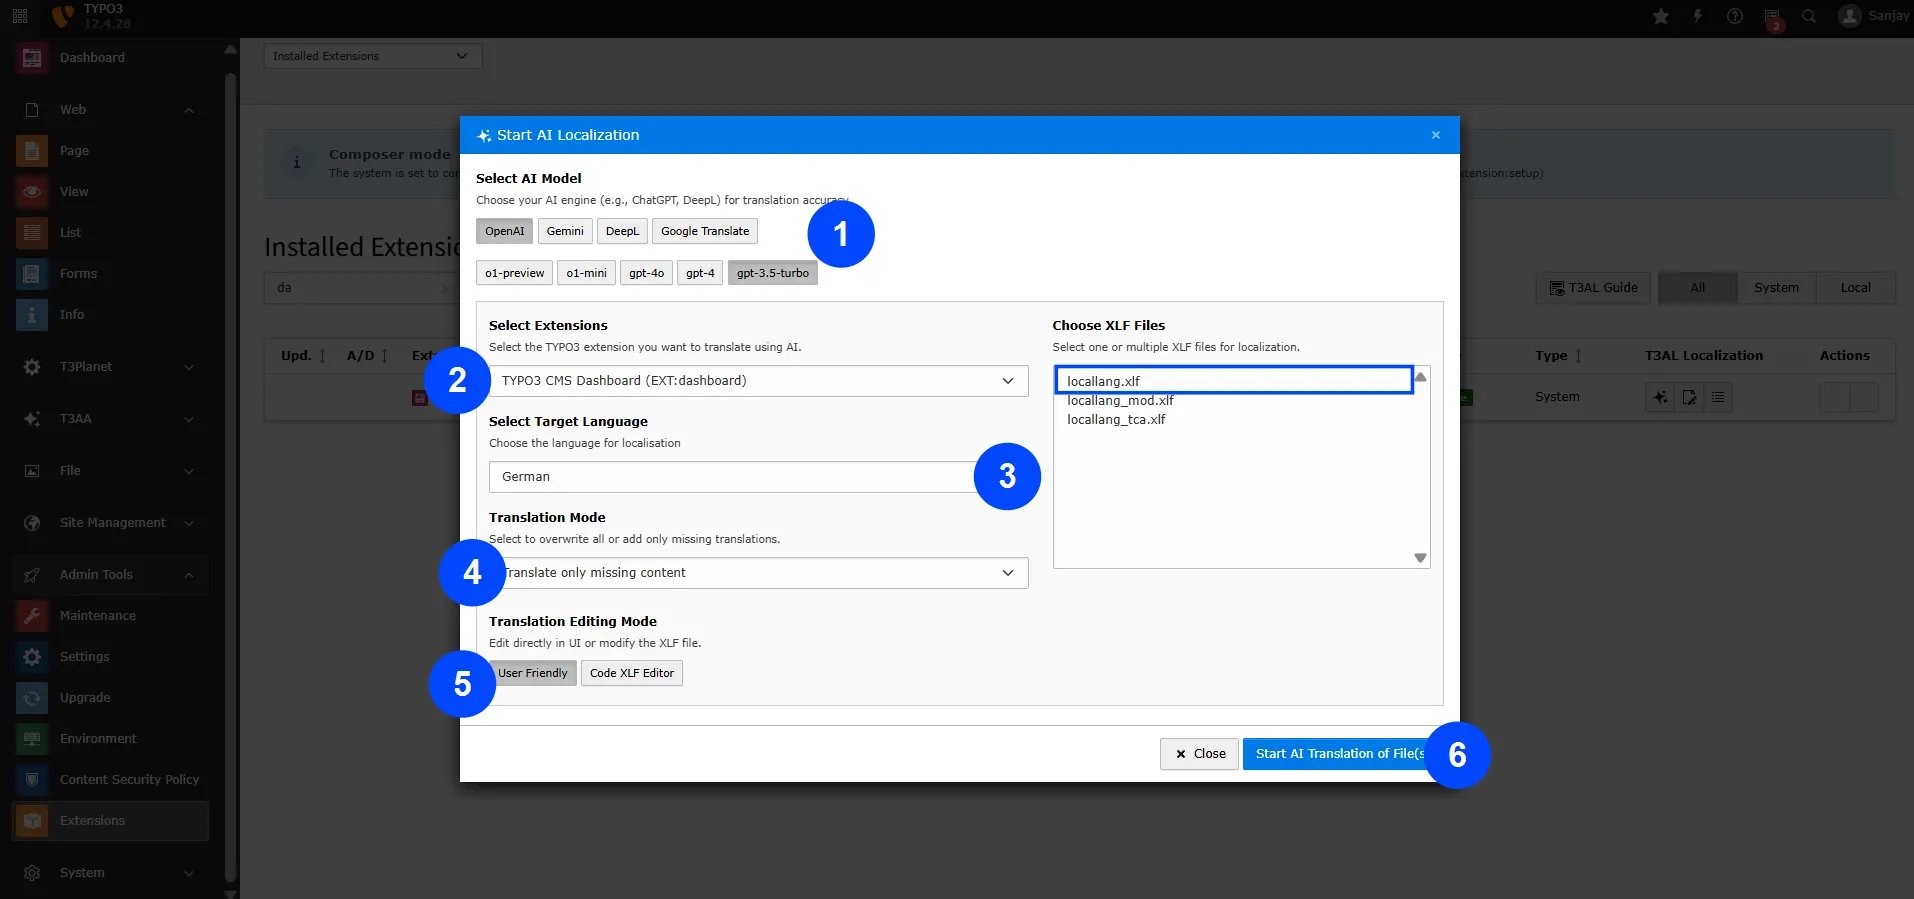
Now you’ll see a pop-up box on your TYPO3 backend screen. Let’s translate your XLIFF file:- Step 1: Choose the AI model for best results (e.g., OpenAI > GPT-4.0).
- Step 2: Select the TYPO3 extension whose XLIFF files you want to translate.
- Step 3: Pick the language you want to translate into (for example, German).
- Step 4: Choose the translation mode: - Translate the whole file (even if it already has translations), or - Translate only missing parts.
- Step 5: Select how you want to edit translations: - Directly in the code editor, or - With a user-friendly interface.
- Step 6: Choose the XLIFF file from your extension.
- Step 7: Click on “AI Start Localization” to begin the translation.
Final Results
Here you’ll see the fully translated content of your XLIFF file.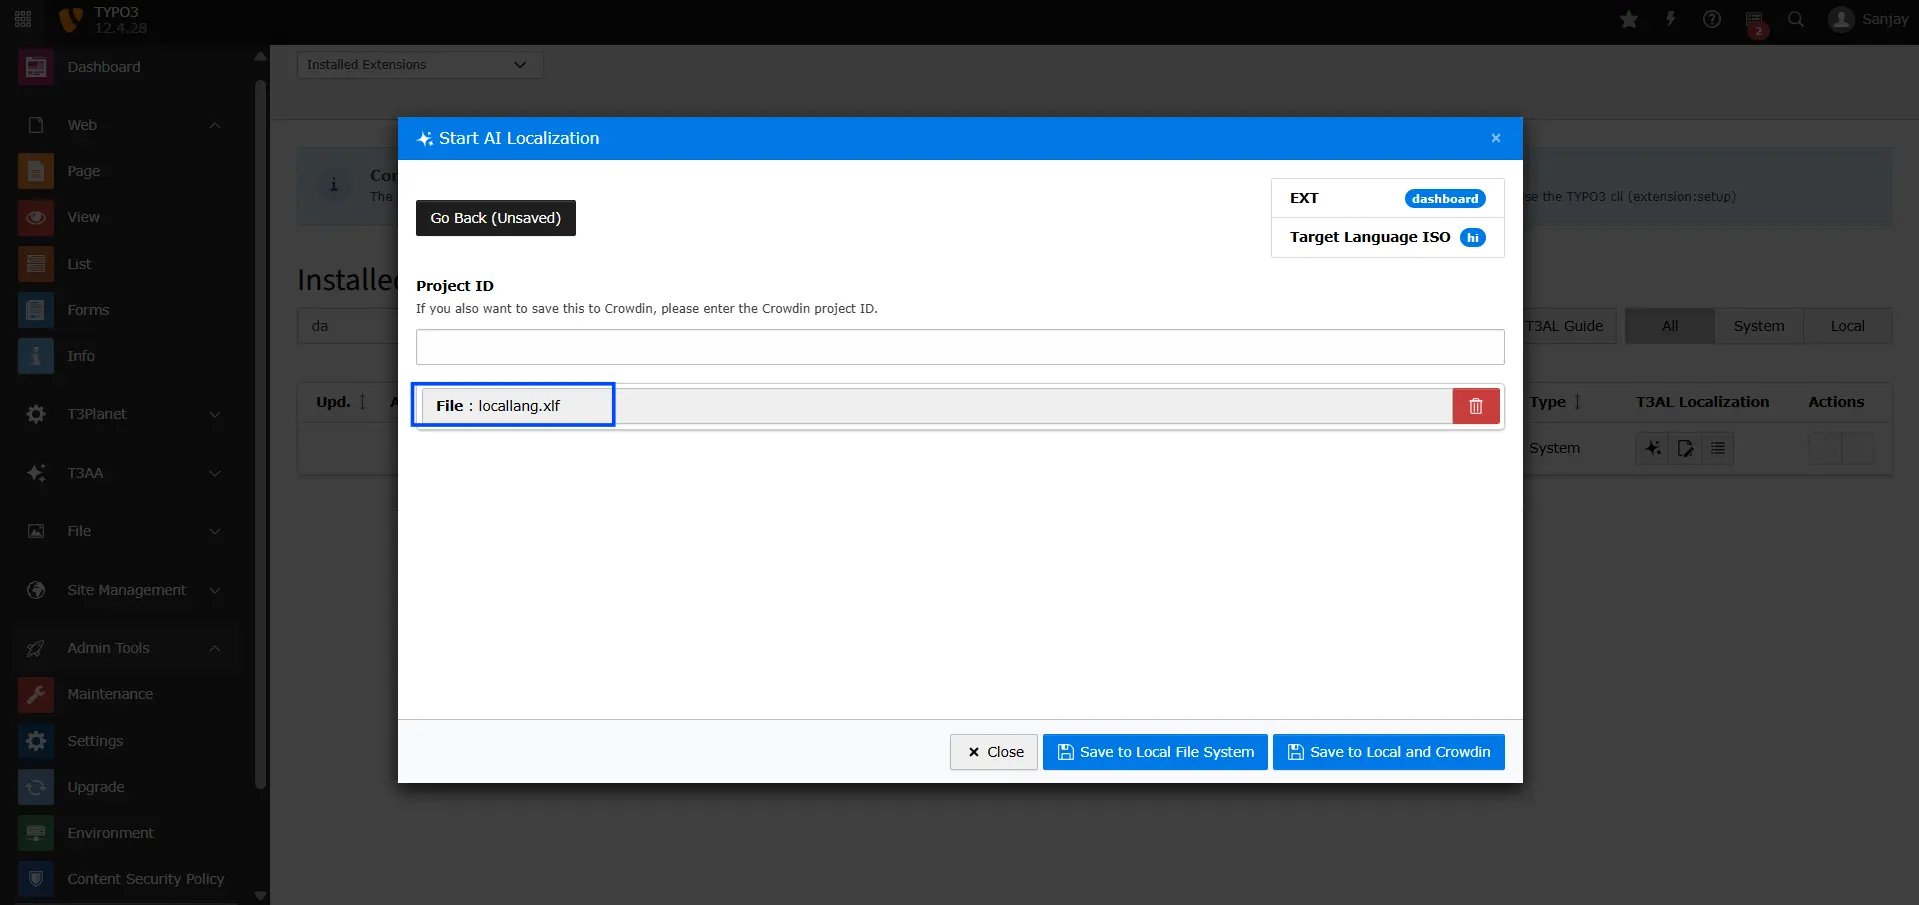
Next Step: Choose Where to Save Your File
- Save to Local File System – This will save the translated content to your TYPO3 server.
- Save to Local and Crowdin – This saves the content both in TYPO3 and directly to your Crowdin project.