

Where to find it in the backend
Select a tab to see each place in the TYPO3 backend. The numbers match the orange markers in the screenshots.- 1. Full backend view
- 2. Ask AI Agent
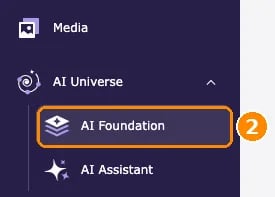
- 3. AI Foundation module
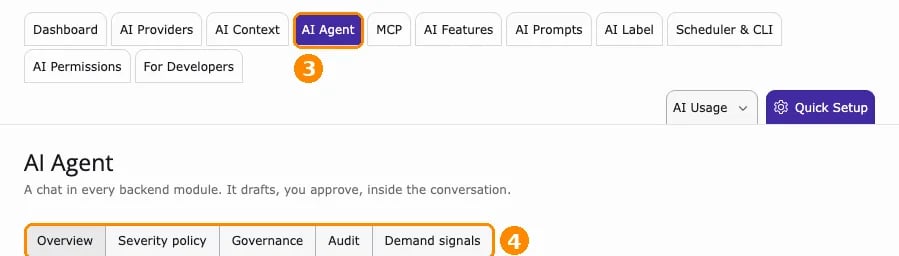
- 4. AI Agent module tab
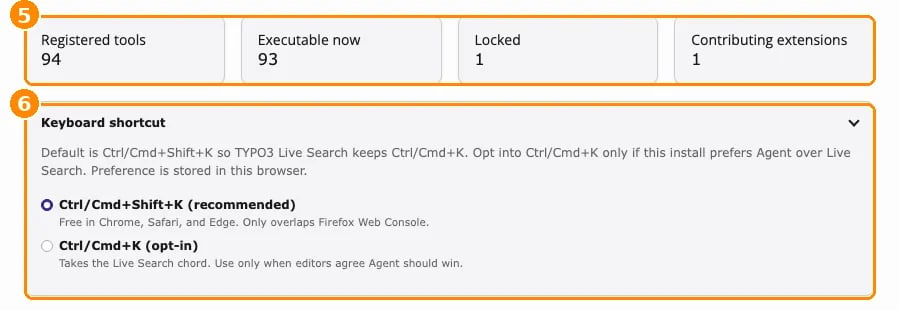
- 5. Status and shortcut
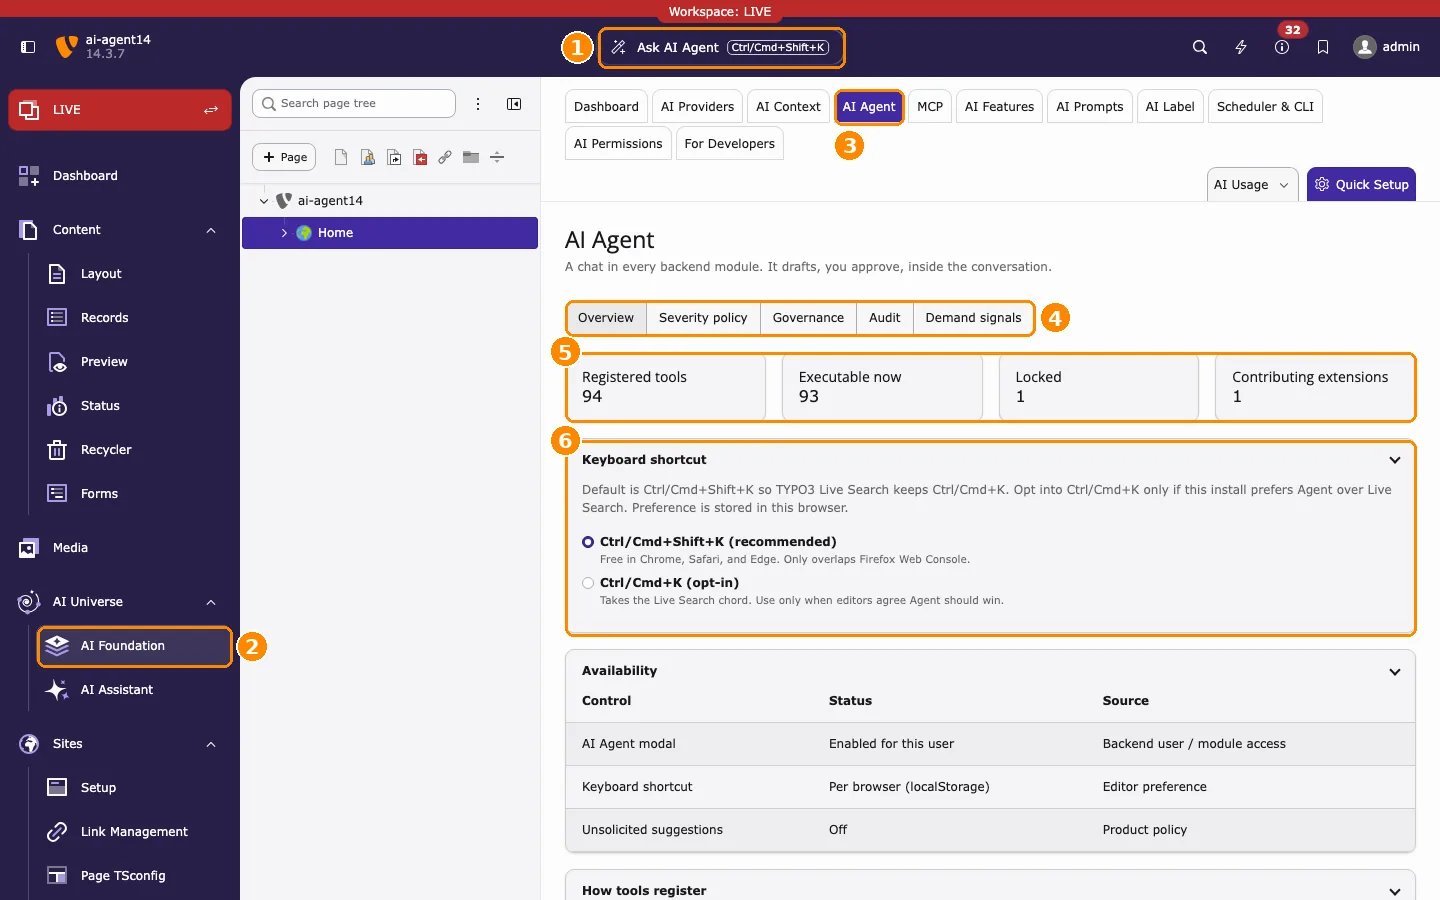
- Ask AI Agent in the top bar.
- AI Universe > AI Foundation in the module menu.
- The AI Agent module tab.
- Its five tabs.
- Tool counters.
- Keyboard shortcut.

Overview
This page shows where you open the AI agent in the TYPO3 backend, what each part of the AI agent window does, and where you manage it. After reading it, you know:- how to open the AI agent on the page you are editing,
- what the icons, the context line, the progress list, and the message field of the window do,
- where to choose the AI provider for a conversation,
- where its settings and status are: AI Foundation > AI Agent.
The AI agent is not a general chat for every backend module. Select the page first, then open the AI agent.
- Select the page first: open the page in the page tree, for example in Content > Layout.
- Open the AI agent: click Ask AI Agent in the backend top bar, or press Ctrl+Shift+K (Windows, Linux) / Cmd+Shift+K (macOS).
- Check the context line: it must show the page you want to change.
- Choose the AI provider: use the provider dropdown below the message field, for example Default: mistral, before you send the first message.
- Nothing is saved until you click Apply.
- Settings and status: AI Foundation > AI Agent.
Open the AI agent in three steps
- Open the page you want to work on: go to Content > Layout and select the page in the page tree.
- Click Ask AI Agent in the top bar, or press Ctrl/Cmd+Shift+K.
- The AI agent window opens on top of the page. Check that the context line shows the right page, then type your request in the message field at the bottom and press Enter.
The AI agent window, part by part
The screenshots in this section are taken from a TYPO3 v14 backend with AI Foundation installed. The orange numbers in each screenshot match the numbered list below it.The whole window
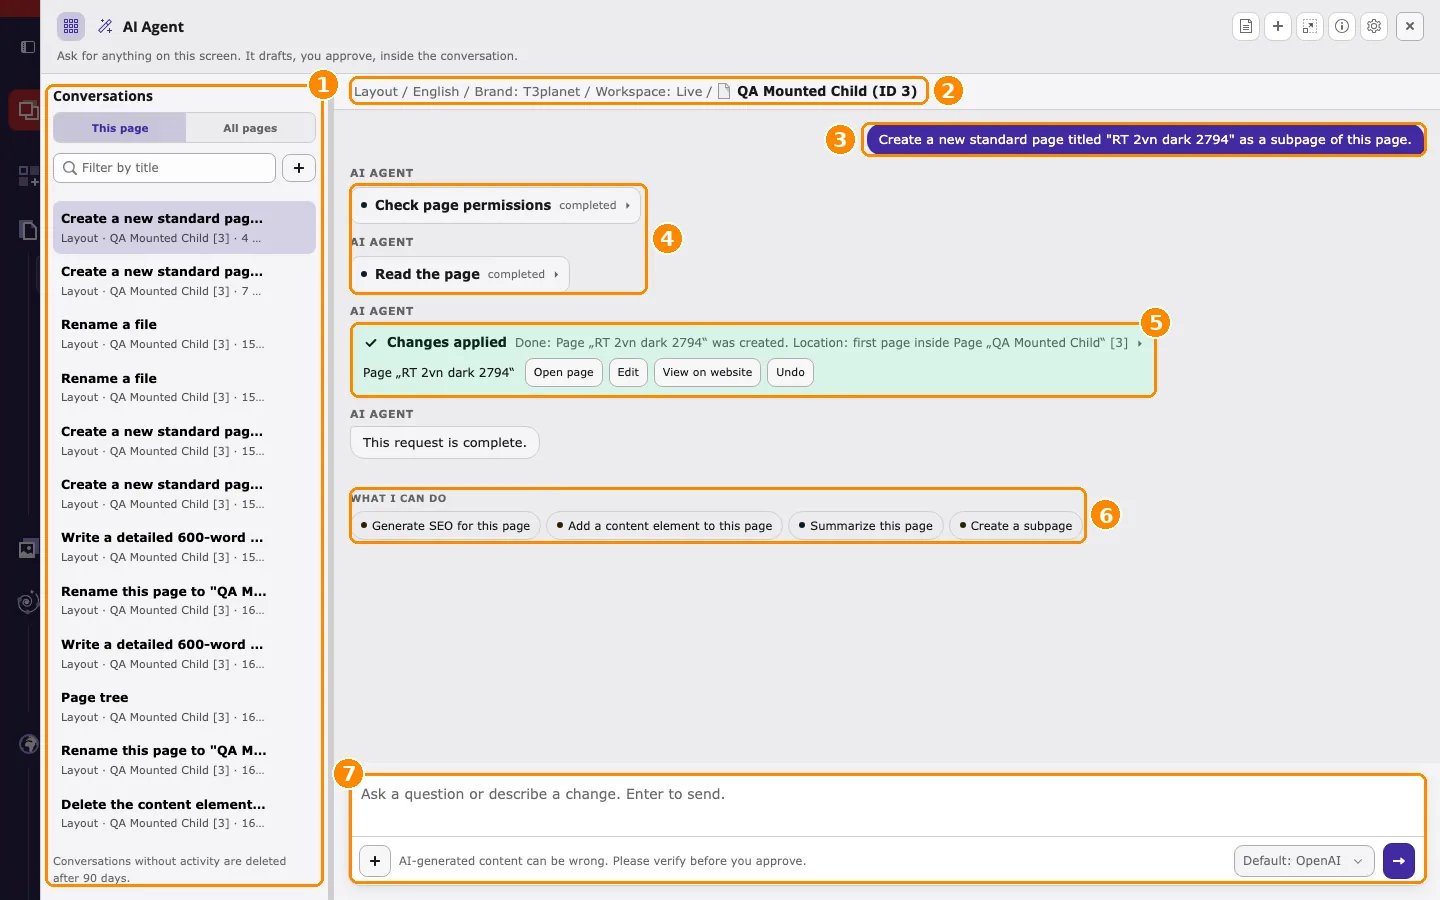
- Conversations — your earlier conversations. This page lists the conversations about the current page, All pages lists all of them. Use Filter by title to find one, and + to start a new one.
- Context line — the page the AI agent works on (see Context line).
- Your request — the message you sent, shown on the right.
- Steps — what the AI agent did to answer, for example Read the page. Click a step to see its details.
- Result card — the outcome. After a change is applied, it shows Changes applied with the buttons Open page, Edit, View on website, and Undo.
- What I can do — suggested next requests for this page, for example Summarize this page or Create a subpage. Click a suggestion to send it.
- Message field — type your next request (see Message field, AI provider, and send).
Header icons

- Show conversations — shows or hides the list of conversations on the left.
- Summarize conversation — writes a short summary of a long conversation, so you can continue with less history. The icon appears after a few messages.
- New conversation — starts an empty conversation. Use it for a new task, or to change the AI provider.
- Full screen — enlarges the window to the full backend area. Click again to return.
- How the AI Agent works — opens a short help panel with the rules of the AI agent and the AI provider in use.
- Settings — opens AI Foundation > AI Agent. Only shown to users who may open these settings.
- Close — closes the window. The conversation is kept; open the AI agent again to continue.
- Context line — see below.
Context line
The context line (marker 8 above) shows what the AI agent works on, from left to right:- the backend module, for example Layout,
- the language, for example English,
- the brand profile from AI Foundation > AI Context, for example Brand: T3planet,
- the workspace, for example Workspace: Live,
- the page and its ID, for example QA Mounted (ID 2).
Progress

- Steps — the planned steps. A crossed-out step is done, the bold step is the current one, the grey steps are next.
- Status — what the AI agent is doing now. Waiting for your approval means a change is ready; review it in the conversation and click Apply or Cancel.
- Step counter — the current step and the total, for example 1/3. Click the arrow to collapse or expand the list.
Message field, AI provider, and send

- Message field — type your request, for example Add a text element with a short introduction to this page. Press Enter to send, Shift+Enter for a new line.
- Attach (+) — Add files or photos attaches an image or document to your request. Actions lists the actions you can ask for.
- Hint — AI-generated content can be wrong. Please verify before you approve. Always review a change before you click Apply.
- AI provider dropdown — below the message field, next to the send button. It selects the AI provider that answers in this conversation. Default: … uses the default provider of the site, for example Default: mistral or Default: OpenAI. See Change the AI provider.
- Send — sends the request. While the AI agent works, a Stop button is shown instead.
Change the AI provider
The AI provider answers your request. You select it in the dropdown below the message field of the AI agent window, next to the send button.- Open the AI agent on your page and click New conversation (+ in the header).
- Open the dropdown next to the send button. It shows the default provider, for example Default: mistral.
- Select the provider you want to use.
- Type your request and send it.
- The provider is fixed per conversation. After the first answer, the dropdown is locked. To use another provider, start a new conversation.
- The dropdown is shown only when more than one provider is available. Add providers in AI Foundation > AI Providers.
- Use a provider that supports tool calling. See Before you start.
Where to find what
If Ask AI Agent is not shown in your top bar, your backend user group does not have AI Agent access. Ask your administrator.
Next steps
- How it works — the four steps of every request.
- Before you start — requirements before the first use.
- Use the AI agent step by step — open the AI agent on a page, ask, and apply a change step by step.
- Keyboard shortcuts — change the keyboard shortcut.
- AI Agent module tabs — the five tabs of the AI Agent module.
- AI agent settings — limits, retention, and conversation settings (administrators).